A while back, I started a series of posts on Accordance Preferences. So far, we’ve covered the General Settings (Part 1 and 2), the Appearance Settings, and the Workspace Settings. Now we’re ready to tackle the Text Display Settings.
This is where you can set the font, size, color, style, etc. of text in all your biblical and extrabiblical Text modules. But before I focus on all the specific options in this Preferences panel, let me give you an overview of the various ways you can change the appearance of a Bible text.
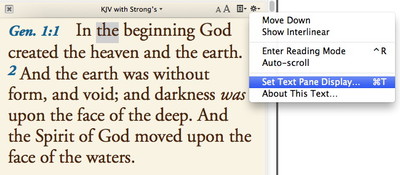
Customizing the display of a single pane: Let’s say you have a Search tab with two parallel panes: one containing the English Standard Version and the other containing the King James. You want to change the King James text so that it uses an Old English font. To do this, you don’t need to go to the Preferences. Simply click the gear menu above the pane containing the KJV and choose Set Text Pane Display… (or use the keyboard shortcut Command-T).
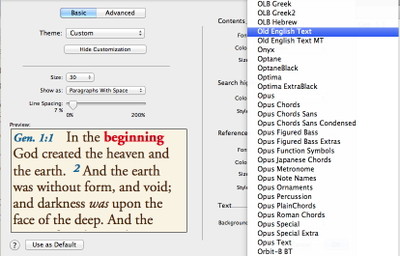
This will open the Set Text Display dialog for that pane. In this dialog, you can choose from a variety of predefined themes, or you can customize a theme to look however you like. To set the text to an Old English font, click the Customize Theme button, then choose the desired font from the Font submenu under Contents.
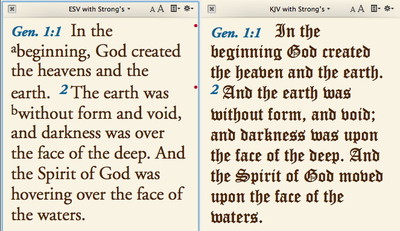
When you click OK, your Search tab should now look like this:
By simply clicking OK to close the Text Display dialog, we are essentially telling Accordance to apply our font change to that specific text pane and that pane only. Thus, if we were to open a second pane containing the KJV, it would appear with the default font settings rather than the Old English font we chose.
Customizing the default display of a specific Text module: If you want every instance of the KJV to use the Old English font, you need to open the Set Text Pane Display dialog, make your selections, and then click Use As Default. An alert will ask you to confirm that you want to save those settings as the default for that particular Bible text. Click Save, then click OK to dismiss the Set Text Display dialog. From that point on, every time you open the KJV, it will appear in the Old English font.
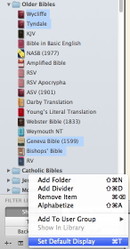 Customizing the default display of several Text modules: Did you know you can select multiple Text modules in the Library and set the default display of all of them at once? Let’s say you want to use the Old English font for other Bibles such as Wycliffe, Tyndale, the Geneva Bible, and the Bishops’ Bible. You can simply command-click each of these Text modules in your Library, then choose Set Default Display from the gear menu at the bottom of the Library panel.
When you choose Old English in the dialog and click OK, the Old English font now becomes the default for those Bibles you selected.
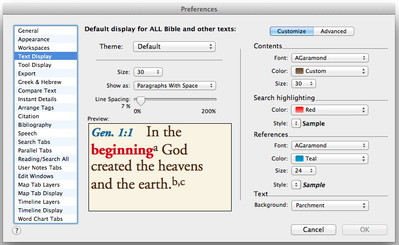
Customizing the default display of all Text modules: Now, what if you want to set the default display of all your Text modules in one fell swoop. That’s the time to open the Preferences dialog and choose Text Display from the list of settings categories. Make changes here and click OK, and your changes will be applied to every Text module in your Library. For example, if you choose Adobe Garamond in this dialog, all your Text modules will appear in that font. That includes the King James and other older Bibles that you had previously customized to use the Old English font. Once you make a change to the Text Display settings of the Preferences dialog, any custom settings you had for specific Bibles will have to be redone.
It is therefore important that you make any global changes in the Preferences dialog before you customize the default display of individual Text modules.
In my next post, we’ll look at the various display options in detail.


