Last week, I wrote a couple posts highlighting aspects of our Bible Lands PhotoGuide, the illustrated dictionary of place names included with our Graphics Bundle. Today I want to show you how to make the PhotoGuide more accessible by linking it to the Atlas.
When you’re looking at a place name in the Atlas and you want to learn more about it, wouldn’t it be nice if you could just double-click it to look it up in the PhotoGuide? Doing so would give you in depth information as well as illustrative photos. This is the primary way I access the PhotoGuide in my own study.
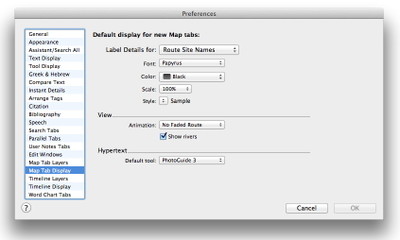
To establish this link, simply open the Preferences and choose the Map Tab Display settings. In the section labeled “Hypertext,” choose PhotoGuide 3 from the Default Tool pop-up menu. That’s it! Click OK to close the Preferences dialog.
From now on, you can double-click a place name in any new map window to look it up in the PhotoGuide. Spend some time double-clicking a few place names and see what you discover.


